Categories
BEAUTY MAKEUP

PRIMARK PS LIQUID EYESHADOWS – REVIEW, SWATCHES & PHOTOS

Hey Everyone,

I hope you’re all doing well! I’m back with another Primark makeup review! They have recently launched a brand new PS makeup range featuring lots of nude shades and subtle shimmers. This includes two gorgeous liquid eyeshadows that I got my hands on in my local store so I thought I would put them to the test and let you know my thoughts… Love Primark makeup? I’ve also reviewed their popular ‘Nudes’ makeup range as well as their ‘Glow’ setting spray, go on, have a read!


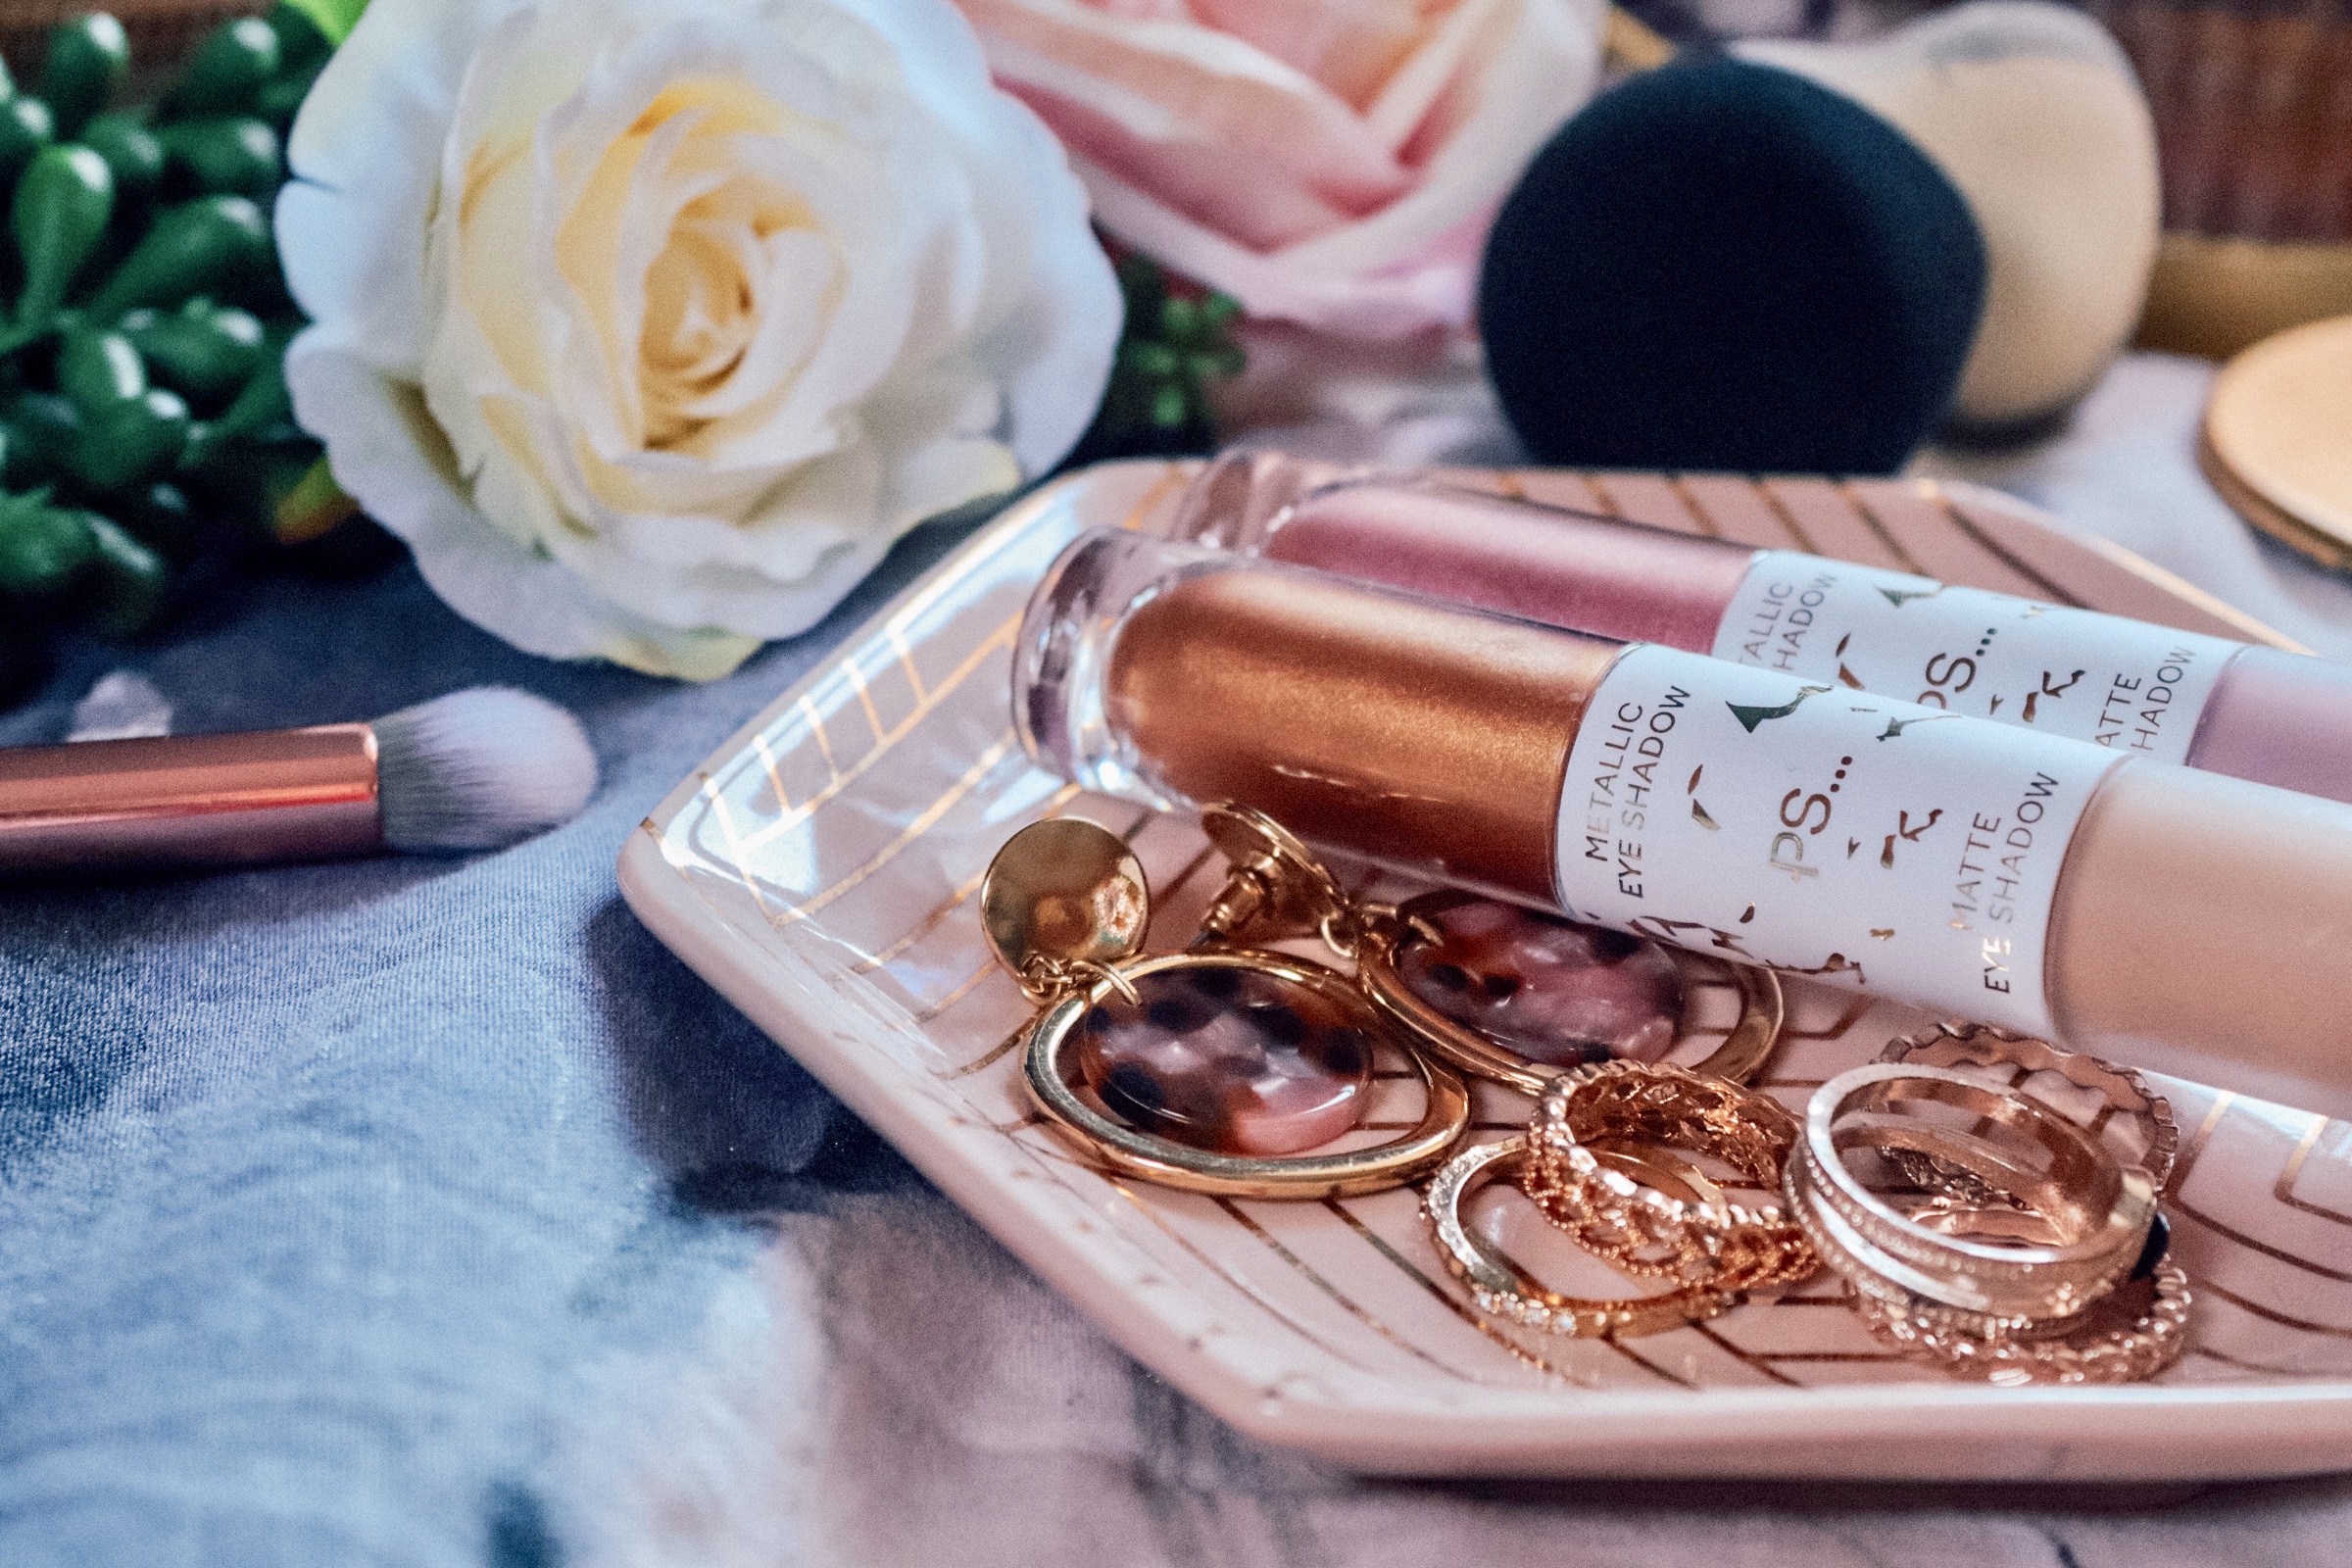
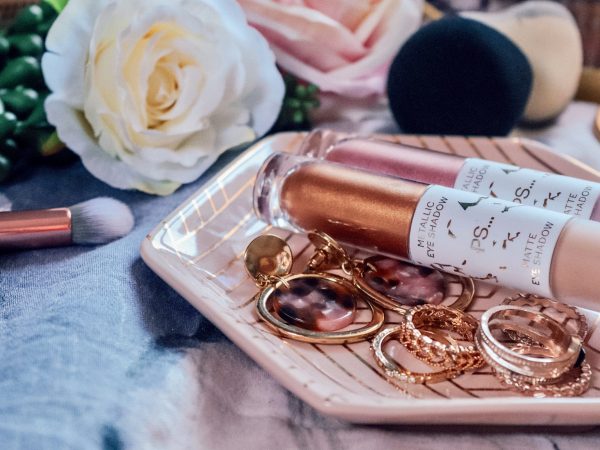
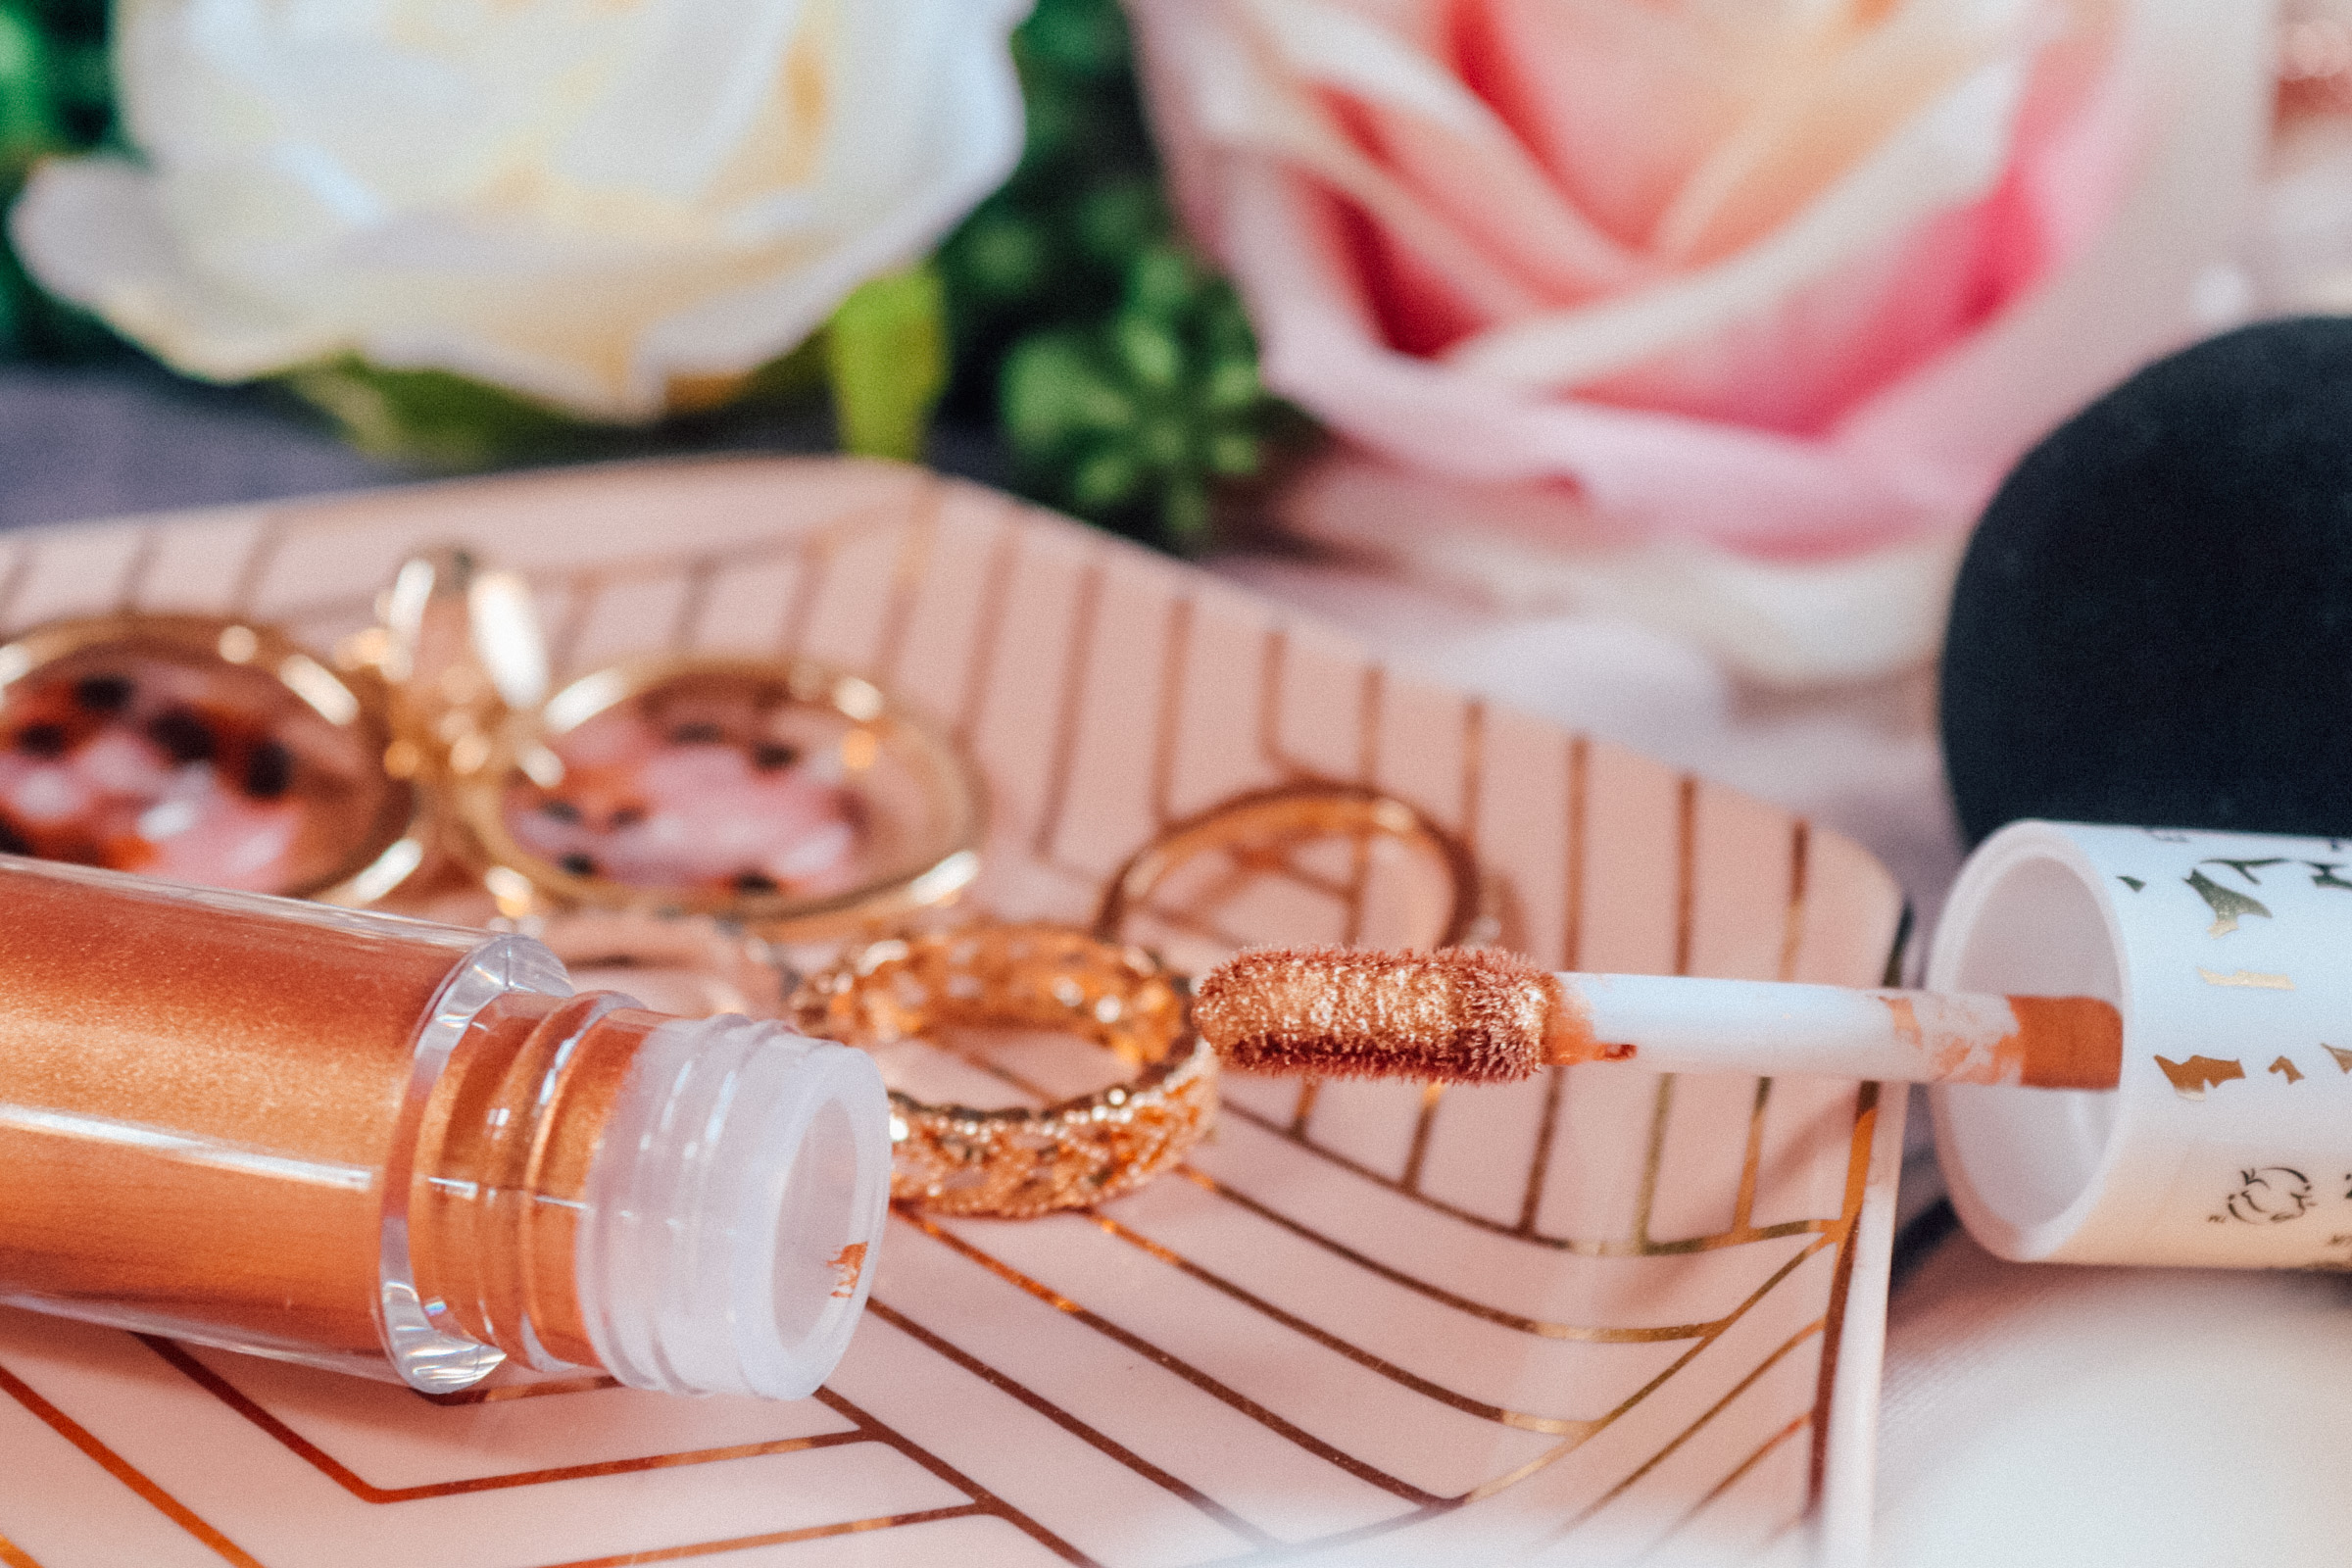
Sadly, the new range only features two of these dual-ended liquid eyeshadows, which is such a shame as I personally would have bought more had there been any! The first eyeshadow includes a gold and a nude shade – a winning combo for any soft-glam makeup lovers. The second includes a metallic pink and a dusky rose matte shade. I love that the shades can be worn together or worn alone.


The tubes are split in half; one end is metallic eyeshadow and one end is just matte – both sections containing 2ml of product. Each end also has a flocked wand/doe-foot applicator. I like that they contain two products and yet take up so little space. I will definitely be taking these on holiday with me to save room! The design and the packaging is super pretty too. I love the simple gold foil effect against a white background, it makes the eyeshadows look more expensive than they are. Also, I love that they made the metallic end clear and the matte side frosted – it’s those extra details that really make an impact. There doesn’t need to be any mess involved either. The products aren’t loose and the packaging isn’t going to shatter and turn my carpet into a shimmering pool of regret. Also, these eyeshadows retail at just ยฃ3 each which is amazing.


Let’s start with the matte shade shall we? Well, oh my goodness, I was not expecting that! Firstly, the formula is a dream. I had to do a double take when I swatched it. It applied so well and it was super easy to blend and work with. Secondly, can you see that pigment?! It’s completely opaque – sorry, ยฃ3 – what?! It dried nice and quickly and once it had, it was there to stay. It actually took some effort to remove which I find reassuring. I don’t want that stuff slipping and sliding around on my lids thank you very much!

The metallic shade is truly gorgeous. I can see myself wearing this shade all the time – on nights out or just for some simple daytime glam. My only issue with it is that it takes a while to dry. If I was in a rush, I wouldn’t want to risk using this. However, if you have the time to wait for it to dry, it’s totally worth it because, I mean, look at it!


This matte pink shade is so pretty! I love wearing pink and purple so I can see myself reaching for this particular shade a lot. It was also very pigmented, completely opaque and really easy to move around and blend. Again, it dried quickly and from that point onwards, it didn’t budge until I removed it with some micellar water. I’m so tempted to apply some holographic eyeshadow topper over this, I think it would look stunning!

Let’s talk about this metallic shade. There’s no denying it’s beautiful, however, I did struggle a little bit with getting it to form a decent layer. When I tried to blend it out it did get a bit patchy. It took some layering to get it where I wanted it. That being said, once I put a little more effort in and took the time to work with it, it looked beautiful. I would definitely wear this shade on a regular basis, especially paired with the matte shade too – what a combo!


So, whats the verdict?

In terms of what I didn’t like, other than a slight struggle with the pink metallic eyeshadow formula, there’s nothing to complain about. It wasn’t as if that was an issue I couldn’t resolve, I just spent a little bit more time applying it and it turned out fine. I would definitely recommend using an eyeshadow primer as a base just to give the product something to stick to.

In terms of what I loved, the matte formula particularly blew me away. I cannot get over how pigmented it is and how easy it is to work with. Although I had a tiny bit of an issue with the formula, both of the metallic shades are really good. When applied correctly, they look lovely. I will definitely be using the gold shade all the time, it’s just so me. Given that Primark didn’t even sell makeup at one point, they’ve come such a long way with their beauty products. I’m extremely impressed with these eyeshadows. The fact that they retail at only ยฃ3 each is incredible! The wands make it easy to apply to product, without faffing and having to use lots of different brushes and tools. The shade range is currently pretty poor, but fingers crossed, they’ll bring some more! I really recommend giving them a try, for ยฃ3 a pop, I think you’ll be pleasantly surprised.

What do you think of these liquid eyeshadows? Be sure to let me know in the comments and donโ€™t forget to follow me on my socials!

N xxxx

Categories
2019 BLOGMAS

MY FAVOURITE CHRISTMAS PHOTO PROPS

Hey Everyone,

I hope you’re all doing well! Welcome to Blogmas Day 5! As a blogger, I regularly find myself searching high and low for bits and bobs to help me create the perfect photos all year round, but especially at Christmas! I thought I would share my favourite props to help you capture and create the most festive of photos!


PINE CONES

These are an absolute staple for festive photos! I actually bought a huge bag of these last year from the charity shop that I volunteer in. However, I stumbled across these snow-covered ones this year and I love them! They also have flexible wire attached to them, making them really easy to attach to wreaths and garlands! You can get your hands on packs of pine cones from craft stores and some bargain shops.


CANDY CANES

If you can resist eating them, keep some aside and use them as props! Candy canes are perfect for adding a vibrant pop of colour to your photos. You can probably get all kinds of colour combos so have a browse at your local supermarket and see what’s available. Keep an eye out for chocolate coins too – they also look great in any festive photos!


DRIED ORANGE SLICES & CINNAMON STICKS

Dried oranges are great for adding some festive details to your photos. If you make them yourself, they’re bound to smell incredible too! Of course, you can always purchase them online or in craft stores too. Cinnamon sticks are another great way of adding something extra to your photos. They look so rustic – plus they smell absolutely incredible! Check out the bits I’ve found below:

Dried Orange Slices, 30g, Hobby Craft, ยฃ3

– Cinnamon Sticks, 70g, Hobby Craft, ยฃ3.50


CHRISTMAS DECORATIONS

I feel like this one goes without saying! You can find all kinds of quirky Christmas decorations these days. You name it, it’s probably out there! I like to use a mixture of tree decorations and homeware in my photos. Go through your bits at home and see what you could use; things that you can lay flat tend to look best (baubles, garlands, tinsel etc.). If you can’t find anything, don’t worry – charity shops are full of decorations at this time of year, why not pay less and still give to a great cause? I also find a lot of stuff in the Boxing Day/New Year sales as everything Christmassy is massively reduced.


BAUBLES

The great thing about baubles is that they come in every colour or style that you can imagine. Try to get a real variety! I find that the sparkly ones are the best when it comes to shooting Christmas content. You don’t have to spend a fortune on them either, you can use your stash at home or you can grab some cheap sets from bargain shops for a couple of pounds. I found mine in Primark last year, they came in packs of 20 for roughly ยฃ2 which was such a great deal. They had every colour under the sun so I think I’m covered for every colour scheme possible now! I’ve also found some amazing baubles in charity shops – they often have really quirky ones or brand new sets that people have donated.


CHRISTMAS MUGS

Who would’ve thought that mugs could make great props? You can just use them in the background of your photos or you can go all out and fill them with hot chocolate, marshmallows and all the trimmings for a scrumptious shot! I bought these two from Homesense – the home of all things festive at this time of year!


BELLS

Bells are not only able to take your present wrapping to the next level, they can also jazz up your photos! I like attaching these to garlands or placing them next to some baubles to add some extra sparkle. You can find them in most craft shops, I’ve linked some options below:

Silver Jingle Bells, 30 Pack, Hobby Craft, ยฃ2.20


SCARVES

Scarves don’t just have to be around your neck this Winter! They make for the most festive of backgrounds, particularly if they’re tartan! I like laying products on them or wrapping them around the borders of a shot to fill the gaps. Throws are also great for this and at this time of year you can get some really festive ones!


N xxxx

TWITTERย |ย FACEBOOKย |ย INSTAGRAMย |ย PINTERESTย ย 

Categories
LIFE

GETTING MY FIRST TATTOO

Hey Everyone,

I hope you’re all doing well! In the midst of all of my deadlines and a very important final year at university, I accidentally stumbled into a tattoo parlour and booked in for a two hour session. I think the main thing holding me back, was the unknown. How much will it hurt? What if it goes wrong? What does it feel like? Will they be nice? Can I bring someone with me? I thought I would talk you through the process itself and answer as many of those questions as possible. I hope that this helps those of you that are scared or apprehensive about getting tattoos and for those of you that have been there and done that, I hope you like how mine turned out!


What does getting a tattoo feel like?

First things first, make sure that your blood sugar levels aren’t low on the day. The most common cause of fainting whilst getting a tattoo is because of the sudden drop in your blood sugar levels. It’s how your body naturally reacts when it feels pain so that is totally normal! My session was booked in for 1 o’clock so I had time for a proper breakfast and then I topped up on some sugary snacks and drinks whilst I was waiting. Once I arrived, my tattoo artist, Magda, sat down with me and showed me the design, which I LOVED! She printed off a few different sized templates for me to choose from and once I had made a decision, she stuck it to my ankle so that I could see where it would sit and how it would look.


What does getting a tattoo feel like?

I couldn’t figure out what all of the wires and the equipment was for when I first looked at it. It all looked so intimidating and I started to panic a tiny bit. I think that’s natural when you start to see all of the actual tattooing gear.


What does getting a tattoo feel like?

It was when I saw the bed that my nerves really kicked in. I’m sure lots of you will be thinking what’s all the fuss about, it’s just a tattoo, right? Well it was my first ever experience of getting one and it wasn’t just a small symbol either. With two hours ahead of me, I had absolutely no idea what to expect. I was shaking like a leaf and I couldn’t stop fidgeting! I made the mistake of sending my Dad this photo and he kindly replied “Looks like an operating theatre…” – lovely, thanks Dad? Magda suggested that I should lie on my side so that she could easily access my ankle and my leg and so that I would be comfortable.


What does getting a tattoo feel like?

I climbed on and lay there shaking (pathetic I know) whilst I clung onto my pal for support – her fingers actually went purple at this point. I asked Magda to count down from three so that I knew when it would begin and so I could see what it felt like before we carried on.


What does getting a tattoo feel like?

Let’s talk pain. Yep, it hurts. Not all the time, but it does hurt. Some people say it does and some people say it doesn’t – I think it totally depends on where you’re getting the tattoo and the shading that your design requires. The best way that I can describe it is that it’s like a persistent, sharp cat scratch. It’s actually more of an annoyance than anything else. We’re talking claws out, get off me you little shit kind of scratching.

Some parts were more painful than others. For example, the back of my leg was really painful but the front was something I became used to after a while. Like I said, I think it totally depends on the location of your tattoo. The shading was also quite painful but again, it was bearable once I knew what to expect. When it was time for my second tattoo, I was totally fine with it and I was even disappointed when it was all over!


What does getting a tattoo feel like? My first Tattoo experience

Excuse the blotchiness and the unflattering angle but this was the finished design! When we first moved into our house, my Dad planted a Cherry Blossom tree in our garden. We had a swing set right underneath where the blossom would fall. We used to spend hours in the garden playing on the swings, particularly during the Summer. It was one of our favourite things to do! After Ben died, I knew I wanted a tattoo that represented something that we had together. I wanted something that at first glance, people wouldn’t understand, something unique and personal.

That’s when I knew I wanted Cherry Blossom. One year, whilst we were playing in the garden, we both came face to face with a bee that seemed to be leaking something all over the paving stones. I started screaming that the bee was having a wee and Ben began to howl with laughter (we were only little, hence the toilet humour) and it became one of my favourite and funniest memories!


What does getting a tattoo feel like? My first Tattoo experience

This one was designed with my mum in mind. Every night before I went to sleep, mum would come into my room and talk to me about my day. If I was anxious or worried about something she would say the following Chinese proverb to me: “Do not fearย going forward slowly; fear only to stand still.”. The words clicked with me and they began to really mean something as I got older and was able to grasp the literal meaning behind it. It continues to shape me today and it has been the most soothing of thoughts at some of the hardest times in my life.

I thought the best symbol to represent these words was a semi-colon: not quite a full-stop but a pause before continuing. I’ve been struggling with chronic anxiety and depression since childhood. There have been times when itโ€™s been manageable and there have been times when itโ€™s just unbearable but itโ€™s been a huge part of my life for many years. The one thing that has remained consistent is the support from my mum. I knew that the semi-colon was also a symbol for mental health so it all began to click into place from there! Mum has always loved painting in watercolour, so I wanted to incorporate that with the proverb that she has always told me.


What does getting a tattoo feel like? My first Tattoo experience

*UPDATE – I returned for my touch-up and I asked for a couple of small changes. Don’t get me wrong, my original tattoo was beautiful and I was really happy with it but once it had healed and I had gotten over the initial excitement of it all, I realised it wasn’t quite what I had envisioned. I had a chat with my tattoo artist and she was more than happy to include these changes in my free touch-up! I explained that I wanted something that looked like a watercolour painting, much softer and almost like you could see the water splashes and where the paint had bled. After an hour, I basically had the tattoo that I had always dreamed of.

If you compare the pictures, you’ll see how much it has changed. There’s so much more detail and the whole thing looks softer and more delicate. Moral of the story is, if you have ANY doubts about a tattoo that you’ve had done, say something! Even if you’re worried about it being an awkward conversation (a professional wouldn’t allow that anyway), it’s on you for life so it’s more than worth it just to make sure you’re happy.


Do you have any tattoos? Are you planning on getting one? Do you have any questions? Let me know in the comments! Don’t forget to follow me on my social media – come and say hey!

N xxxx

Categories
BEAUTY MAKEUP

ANASTASIA BEVERLY HILLS – SOFT GLAM PALETTE {REVIEW & SWATCHES}

Hey Everyone,

I hope you’re all doing well! Today’s post is all about the latest addition to the Anastasia Beverly Hills family of eyeshadow palettes, Soft Glam. Since their cult favourite, Modern Renaissance, the ABH palettes have been somewhat of a collectors item within the beauty community. I have to say, they are some of the best palettes that I’ve ever used so I’m sure you can guess which direction that this review is going to go in…

This palette contains affiliate links


Anastasia Beverly Hills Soft Glam Palette Review & Swatches

As soon as I saw a picture of the palette online, I knew it would be full of neutrals and warm-toned shades. The name “soft glam” sounds loike a combination of subtlty and sophistication, which is right up my street! As much as I love embracing my crazy inner MUA, sometimes I love to keep it simple! I’m drawn to nudes and neutrals just as much as I am to vibrant and dramatic colours, so I know that I will still really enjoy using this palette. It seems to me that this is the kind of palette you can take anywhere and you’re good to go – which is ideal for people that travel a lot! The packaging, as expected, has the same gorgeous velvety exterior as the other ABH paletes, which I absolutely love! It looks and feels so luxurious and it’s so much nicer than the usual plastic and cardboard most other brands use. The only slightly “hmmm” part about this palette, is the price tag. At ยฃ43, it’s a rather expensive addition to any makeup collection. The question being, is it worth it?


Anastasia Beverly Hills Soft Glam Palette Review & Swatches

The palette contains 14 beautiful shades, including essential mattes to stunning shimmers. Just like I thought, the shades are warm-toned and neutral, perfect for both day-time looks as well as night-time glam. They’re also the kind of shades that can work all year round, meaning you can easily get your money’s worth when it comes to usage! So many looks can be created with this palette, from elegant and understated to bold and glamorous. There is a slight overlap with some of the shade from the Modern Renaissance palette (Tempera, Burnt Orange and Cyprus Umber), which is kind of frustrating as I paid a lot of money in the hope that this palette would be a totally new addition to my collection, however, I do love all three of those shades and I’m quite glad to have some replacements. I’ve been wearing the shadows for a couple of weeks now and I have reviewed every single one below!


Anastasia Beverly Hills Soft Glam Palette Review & Swatches

Tempera – Ultra-matte beige with warm undertones – One of my favourite base shades ever. I always use this before I apply anything else to my lids. It always makes my eyes look bigger and brighter, and it compliments any shadow that I wear it with. It’s velvety soft and yet it’s so richly pigmented, I don’t know how they do it. It blends like a dream without losing any coverage either, 10/10! 

Glistening – Iridescent gold with orange undertones – This shade doesn’t have the same “wow” factor that the other shimmers do as it’s not as pigmented. It blends out to be quite sheer on me, however when applied with a wet brush, I can build it up a fair bit. However it’s a shame it isn’t more intense. I guess the palette is called “soft” for a reason though, right? It’s probably the ideal shimmer for someone that prefers a subtle look. 

Orange Soda – Ultra-matte pastel peach – How gorgeous is this shade? I can see myself wearing this all year round as I love warm toned shadows! It’s pigmented and blends really well too. It tends to fade after a while so I like to combine it with other shades or just use it as a subtle transition into something darker. 

Rose Pink – Rose gold/copper with warm undertones – Now we’re talking, this shade is right up my street! I love anything rose gold – especially when it comes to makeup! It’s pigmented but can sometimes be difficult to apply so I like to use a good base as well as setting spray to help it along a bit.

Sultry – A medium-dark coppery chocolate brown – YES – I love this shade! The colour payoff is amazing and it adds a touch of drama to any look. I love using this on the outer part of my lid to create some depth. I nearly always use it with a damp brush to make it more intense. 

Bronze – Metallic bright bronze-gold – The sparkle that this shade gives off is amazing, I feel so glam when I’m wearing it and I always get compliments whenever I have it on. It’s so bright that it makes me look ten times more awake! Again, I tend to apply it with a wet brush, which always intensifies the payoff.

Mulberry – Ultra-matte deep mulberry/plum – The formula is velvety soft and it blends beautifully. I was worried it would be patchy but it was totally fine and applied evenly.


Anastasia Beverly Hills Soft Glam Palette Review & Swatches

Dusty Rose – Ultra-matte dusty mauve – I love this shade. It’s so elegant and even on it’s own looks lovely. It’s super pigmented and it applies evenly too. I reckon it’s the perfect springtime shade and would also look gorgeous in summer. I don’t actually own any shades quite like this either, so I’ve really enjoyed experimenting with it over the last couple of weeks.

Fairy – Multi-dimensional bright yellow-gold – Isn’t that the perfect name for this shade? It’s so soft and gentle and yet so pigmented and bright! I’ve been wearing this almost every day and I blooming love it. I always apply it on top of a concealer instead of a primer to intensify the brightness and it works a treat!

Burnt Orange – An ultra-matte deep orange – This shade is so pigmented! I didn’t even have to try to get it to swatch well either! It blends really well so I love using this in the crease as a transition shade and also on it’s own for a more subtle look. 

Sienna – Ultra-matte earthy brown with red undertones – I love this shade! I’m getting some strong autumnal vibes, so as soon as September rolls around, I can see myself wearing this a lot! 

Rustic – Ultra-matte cinnamon brown – I think browns are the shades that I reach for the most! Rustic blends out for a subtle look but can also be built ip up to be quite bold too. I love wearing this on it’s own with a tiny bit of shimmer on the lid. However, as lovely as it is, you may be able to see in the photo above, that it darkened in random places, which made it look a little bit patchy. 

Cyprus Umber – Ultra-matte dark coffee brown – I feel like I’m repeating myself here but it’s another brown shade that I reach for all the time! This shade comes in so handy for adding a bit of depth to a look or for creating a smokey eye. Also, I have to say that the pigmentation is insane too, I’m very impressed. 

Noir – Ultra-matte carbon black – I love it when palettes include black shades! There was a time where I used to wonder how they could ever be used, whereas now I’m using them all the time. Just like Rustic, it can turn a day-time look into night-time glam in seconds. I often blend this along my lower lashline to make my eyes look bigger and brighter. It’s not as creamy as the other mattes in the palette, so it takes a bit more work to blend out. 


I actually really like this palette. I was a bit worried that it would be a tad too subtle for me as I tend to go for shades that I can go all out with. However although the shades are mainly neutral, are all rich in pigmented and with that comes the option to go all out if I wanted to, or I can keep it simple. That’s why I like this palette, it gives you the freedom to create what you want and even just looking at it, I can see so many different combinations! Some of the shades needed a bit of help from primers and wet brushes but I didn’t expect them to be as intense as some of the shades in their other palettes, as after all, it’s been named “soft” for a reason. I’m experimenting with the whole “less is more” idea, so I reckon this palette will come in handy when trying to create some more natural looks. I also think that ABH have been working on their matte formulas as they all felt velvety to the touch (more so than usual) and blended out beautifully. However, a couple of the mattes seemed to darken slightly in random places which isn’t ideal for a high-end palette. My main issue with this, is that I paid a lot of money for this palette, so in all honesty, any flaws aren’t going to go down well. If you’re going to charge a lot, the quality needs to be as close to flawless as possible.

So in conclusion, I like it! It’s a fantastic palette and I’m glad that I added it to my collection. It’s not perfect but it’s pretty close! The weird dark patches with some of the matte shades are a bit annoying but I can get over that as I’m able to use the shades and still get my money’s worth. I can see myself taking this on holiday with me as well as using it in winter so in my opinion it’s a palette that can be used all year round. Not only does it come with 14 gorgeous shades that can create so many different looks, but it also comes with a generously sized mirror, making it ideal to travel with for on-the-go use. Not everyone wants to go for the perky pinks or the vibrant violets, so I would recommend this palette to anyone that’s looking for something more delicate with a hint of glamour too.

Check out the Soft Glam palette here!

Want to know what the other Anastasia Beverly Hills palettes are like? Check out my reviews of Modern Renaissance, Subculture and Prism palettes to find out!

TWITTER | FACEBOOK | INSTAGRAMPINTEREST 

N xxxx